Paint an acrylic tree with grouped foliage
In this guide
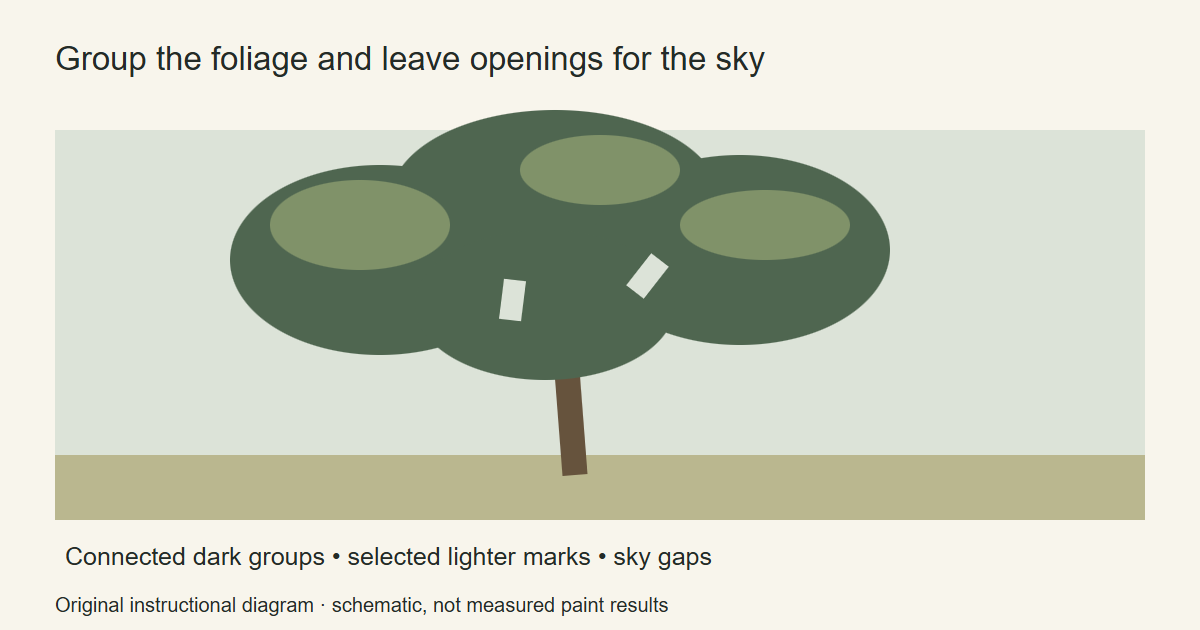
Start an acrylic tree painting with the shape of the whole crown. Break that silhouette into a few connected foliage groups, place the trunk and main branches where they are visible, then add a limited number of lighter marks. Leave some gaps for the sky instead of covering the crown with separate identical leaves.
This exercise uses a broad leafy tree as its subject. The diagram is an original painting plan, not a species guide or a photographed test result.
Find the tree’s outer shape
Choose a tree you can observe directly or a reference photograph you own or may use. Look at the edge of the crown before looking for individual leaves. Does it spread wide, rise in a narrow column, or lean to one side?
Draw that outer shape on scrap. Make another thumbnail with the crown slightly larger or shifted within the format. Keep the trunk’s direction and the amount of ground visible in mind as you choose between them.
Do not make every bump along the top edge the same size. Compare the outline with your reference and select the larger changes you want to keep. This first drawing should remain readable when you look at it from farther away.
Plan a few foliage groups inside the silhouette
Use a pencil to divide the crown into larger masses. Let some groups overlap. Leave a few openings where the sky can be seen through the branches, based on your reference rather than an even pattern of holes.
Choose which parts will be darker and which will receive lighter marks. For this exercise, keep the darker groups connected enough to hold the crown together. You can test the arrangement with one dark paint and white before making a full color version.
Canson’s acrylic autumn landscape lesson separates broad foliage passages from later branch and highlight work. The practical point is to establish the larger structure before concentrating on small marks. The tree in this exercise has its own composition and palette.
Make a small set of greens
Prepare a main foliage mixture, a darker mixture and a lighter variation. Use your actual paints to decide how to change them, and test the samples after drying.
Avoid assigning one universal formula to “leaf green.” Compare the mixtures beside the planned sky and trunk colors. If all the samples are equally insistent, choose a quieter passage for part of the crown before starting the canvas.
The mixing chart exercise provides space to record the tube names and what you added. Keep enough of the main mixture aside for repairs, including any openings you later decide are too large.
Paint the background, then the foliage masses
For this version, paint the sky and the broad ground area first. Let them dry before replacing the main guide marks for the tree.
Place the darker foliage groups with a brush large enough to make them as shapes. Connect the groups where the reference calls for it and keep the planned sky openings clear. Do not outline every cluster with a separate dark contour.
Canson’s opaque acrylic method moves from the larger color areas to finer marks. Use that order to check the crown’s size while the painting is still simple.
Place the trunk and only the visible branches
Draw the trunk’s path lightly over the dry base where it will be visible. Check where it divides and which parts disappear behind the foliage.
Paint the main visible connections first. Let the branch strokes change width rather than making a set of equally thick lines. Stop where a branch disappears behind a foliage group; you do not need to draw its hidden route through the whole crown.
If the trunk feels disconnected, compare its base with the ground and its upper path with the nearest large branches. Repair that connection before adding bark texture or tiny twigs.
Add light to selected groups
Try a lightly loaded, broken mark on scrap. Compare it with a smoother stroke from the same brush. Choose the mark that suits the tree you are painting.
Place lighter marks in a few selected groups, leaving some of the dark base visible. Vary the mark size and direction according to the reference. The goal of this exercise is a readable grouping, not a complete inventory of leaves.
If this is a tree within a larger landscape, compare it with the distant forms. Canson discusses quieter contrasts toward the background as a way to suggest depth. The mountain exercise applies that comparison to a different subject.
Reopen the sky if the crown becomes solid
Let the crowded area dry. Mix or retrieve the sky color and test a small patch beside the painting. Repaint only the openings that help the main branch structure or the outer silhouette read clearly.
Look at the full tree after each change. If you have added equally bright marks everywhere, simplify one group with a darker base mixture and compare the result before touching the rest.
For a prepared woodland composition, the landscape collection at Artistry By Numbers offers a related option. For your next freehand study, use the same paint mixtures but choose a tree with a noticeably different crown. Keep the change focused so you can compare what the new silhouette asks you to do.
Acrylic Painting Ideas and Artistry By Numbers are owned by OmniLearnConsultingCommerce LLC. Links to Artistry By Numbers lead to our related painting business.
Illustrative image: Oak tree by plong, CC BY 2.0. Cropped and resized. Licensed reference photograph; not a photograph of a painting produced for this tutorial.