Acrylic ocean painting: waves, horizon and reflected light
In this guide
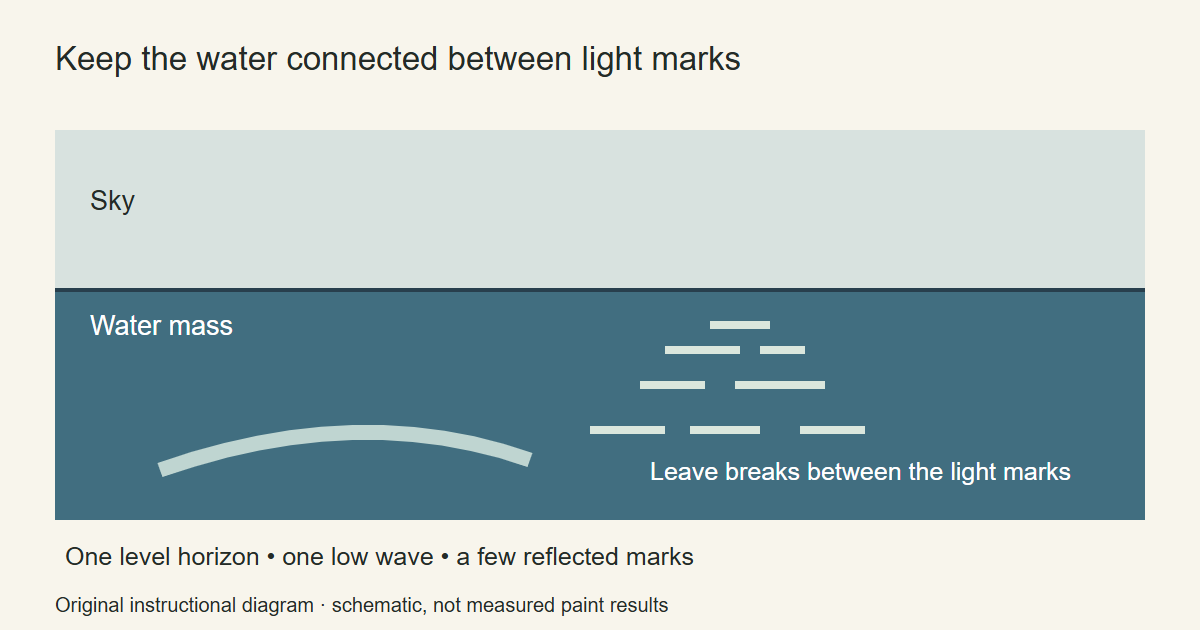
For a first acrylic ocean painting, separate the sky from one connected water shape. Establish the horizon, paint the broad areas, then place a few broken light marks. Add one wave only after that quiet arrangement reads clearly.
This is a simplified painting exercise. The diagram explains the placement and direction of marks; it is not a simulation of water physics or a photograph of a completed paint test.
Pick the kind of water you want to paint
Choose calm water or a breaking wave for the main subject. Trying to make the same first study describe every kind of sea creates more decisions than you need.
The main version here uses a calm surface with a low wave nearer the foreground. Choose a reference photograph you own or may legally use. Look for a visible horizon and a manageable pattern of light and dark areas rather than an image filled with dramatic spray.
Make a small sketch with only the horizon, the water area and the position of the strongest light. Canson’s Port at dawn lesson likewise begins by locating the main reference points. Its detailed harbor scene is a separate lesson; this exercise deliberately leaves out the buildings.
Keep the horizon intentional
Draw the horizon lightly. Compare it with the top and bottom edges of the support before painting. If you want a level horizon in this study, check both ends instead of correcting the line repeatedly once the sky is wet.
Give the sky and water different amounts of space. In one thumbnail, leave more room for the sky. In another, lower the sky area and emphasize the water. Choose the version that gives your planned subject enough room.
Use a broad brush for these first areas. The brush guide compares shapes if you need a tool that can cover a field as well as place its edge.
Mix the water family on the palette
Prepare a main water mixture, a darker variation and a lighter variation. Choose them by comparing dry samples with your reference. Ocean water does not come with one tube recipe that fits every scene.
Keep the lighter mixture related to the rest of the palette. If you add white, look at the result alongside the darker sample before deciding it belongs in the painting. Record a useful mixture on the color chart.
If you need longer working time for a transition, use the directions for the actual paint or medium you choose. Liquitex Slow-Dri Medium is one example; it also changes transparency. Do a sample rather than assuming any additive has the same effect.
Paint a quiet base before adding ripples
Paint the sky, then let it dry for this version. Fill the water area as a broad connected shape. Keep its upper edge consistent with the horizon you planned.
Place a darker passage where the reference calls for it. Do not immediately break the whole surface into small marks. First compare the large water mass with the sky and any shore shape.
The opaque acrylic method described by Canson moves from large areas to smaller motifs. That sequence helps you see what the painting needs before committing to repeated ripples.
Break up the light instead of drawing stripes
Test short horizontal strokes on scrap with the lighter mixture. Vary their lengths and leave spaces between them. Place a few in the light area you identified in the reference.
For this stylized version, keep the marks quieter toward the horizon and broader in the nearer area. Compare them with your photograph; do not apply that arrangement as a law for every sea or viewing angle.
Pause after a few marks. If they read as a ladder of evenly spaced lines, leave out some of the next ones and change the lengths. If the water is becoming uniformly bright, restore part of the base mixture after drying.
Add one low wave
Sketch a shallow curved band on scrap. Give it a darker side, a lighter lip and a few interrupted foam marks. Keep the three parts distinct in the sketch before trying them on the painting.
Place the wave where it supports the composition. Use the darker water mixture to establish its body, then add the lighter passage and a restrained amount of foam. Leave some of the darker shape visible so the wave does not become a solid white strip.
For the next version, change the lighting rather than adding many more waves. The sunset exercise offers a way to plan a warmer sky. If you prefer a prepared ocean design, browse the seascape kits at Artistry By Numbers and compare how their large light and dark areas are arranged.
Acrylic Painting Ideas and Artistry By Numbers are owned by OmniLearnConsultingCommerce LLC. Links to Artistry By Numbers lead to our related painting business.
Illustrative image: I can see clearly now by paul bica, CC BY 2.0. Cropped and resized. Licensed reference photograph; not a photograph of a painting produced for this tutorial.