Paint a sunflower in acrylics without outlining every petal
In this guide
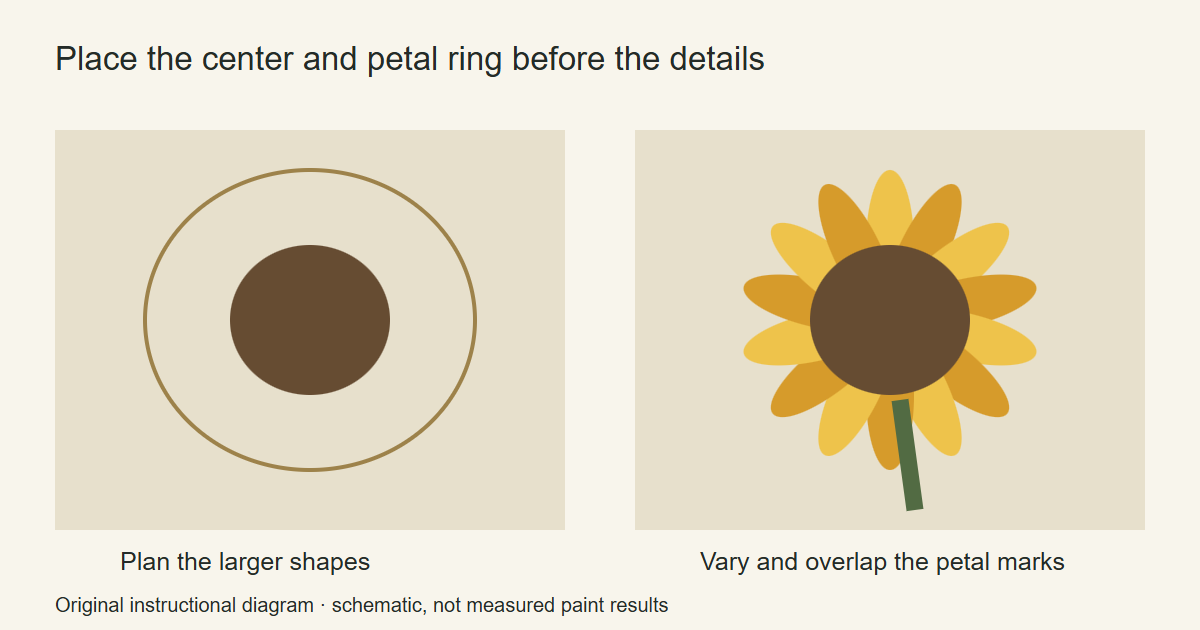
Paint an acrylic sunflower as a few connected shapes before trying to describe every petal. Place a dark center, mark the outside of a loose petal ring, then add a stem and only the leaves the composition needs. Paint some petals in front of others rather than outlining each one with the same dark line.
The accompanying diagram is an original guide to those shape decisions. It is not a botanical identification chart or a photograph of a finished acrylic demonstration.
Choose one flower and one viewing angle
For this exercise, choose a single flower viewed mostly from the front. A reference you own or may use legally will help you compare the center, the outer ring and the way the stem meets the head.
Draw the head as a large outer shape with a smaller center inside it. Let the center sit slightly off the exact middle if that matches your reference. Check how much room remains between the petals and the edge of the support.
Try the same outline in a tall and a square thumbnail before choosing. Canson’s introductory acrylic lesson uses preliminary planning to place the important elements. Here, the useful decision is how much of the flower and stem belongs in the frame.
Test the yellow on the background you chose
Paint a small patch of your planned background on scrap. Let it dry, then put a stroke of your yellow over it. Compare the dry result with the kind of petal you want.
Do not decide that every tube with “yellow” in its name will cover in the same way. Check your paint’s label and the test patch. If the background shows more than you want, consider a lighter base for the petal area or a second layer after drying. Make that comparison on scrap before covering the whole canvas.
Set aside a lighter petal mixture, a darker variation and the center mixture. Keep notes in the color mixing chart if you make a combination you want to repeat.
Paint the background and the main flower shape
For this version, paint a simple background first. Keep it quiet enough that the sunflower outline is easy to judge. Let it dry, then lightly replace any guide marks you need.
Block in the general petal ring and the center as broad areas. Do not stop to paint small seed-like dots at this stage. Canson’s opaque acrylic technique begins with the largest areas before finer marks. Use that order to keep the flower’s proportions visible.
Step back. If the center is too large or the ring is too narrow, adjust the main shapes now. Fine detail will not resolve a proportion you already want to change.
Use petal marks with different lengths
Try a loaded brush stroke on scrap. Press it down, pull a short distance and lift away. Turn the brush slightly for the next mark. Compare a broad rounded stroke with a narrower one.
A filbert is one option for this exercise. Winsor & Newton describes its oval-tipped filbert head as making a broad mark with a softer end. The brush guide helps you compare other heads rather than treating one brush as mandatory.
On the flower, vary the petal lengths according to your reference. Keep some darker passages between or underneath the lighter ones. Add the nearer petals after the underlying passage has dried if you want a clear overlap.
Give the center a few deliberate changes
Mix a small lighter variation of the center color. Place a few short or stippled marks where the reference calls for them, leaving areas of the original dark visible.
Avoid spreading equally bright dots across the whole center unless that is the decorative pattern you intend. Compare the center with the petal ring from farther away; it should still belong to the same flower rather than reading as a separate disk covered in unrelated marks.
For this study, make the strongest contrast in a small part of the head. This is an editorial exercise choice, not a claim about the only way to paint a sunflower.
Add a stem that supports the head
Lightly indicate the stem’s direction before painting it. Check where it disappears behind the flower and where it reaches the bottom of the composition. Use a connected stroke or a few joined passages rather than a series of separate green dashes.
If you add a leaf, draw its broad shape first and leave the small veins until you know they are useful. A simple change of value can be enough for this first study.
If the flower has become too busy, let it dry and simplify part of the petal ring with a base mixture. Return to the broader flower painting guide for a simpler shape exercise. For a prepared floral design, explore the floral and botanical kits at Artistry By Numbers.
Acrylic Painting Ideas and Artistry By Numbers are owned by OmniLearnConsultingCommerce LLC. Links to Artistry By Numbers lead to our related painting business.
Illustrative image: Sunflower by Cost3l, CC BY 2.0. Cropped and resized. Licensed reference photograph; not a photograph of a painting produced for this tutorial.